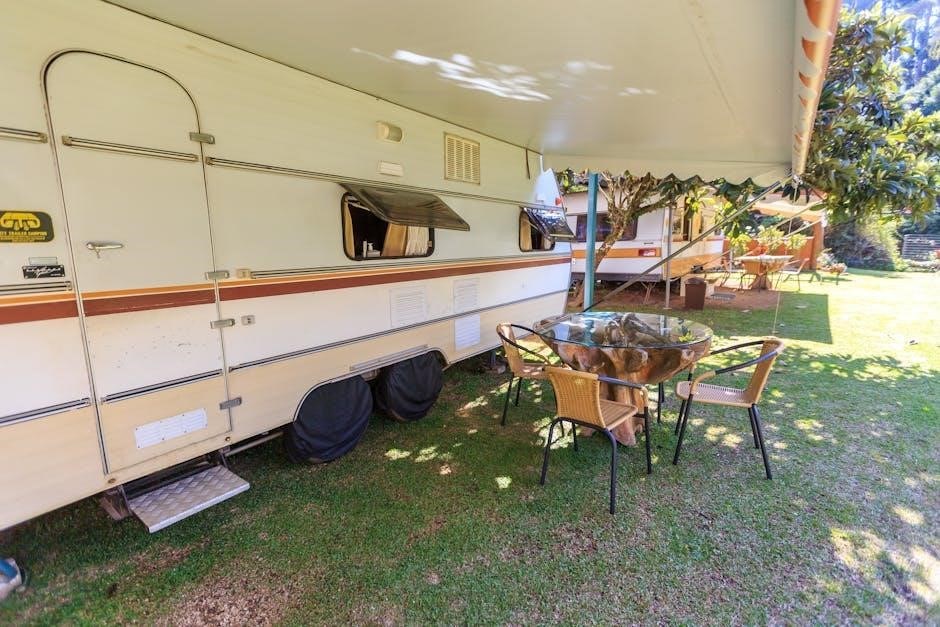
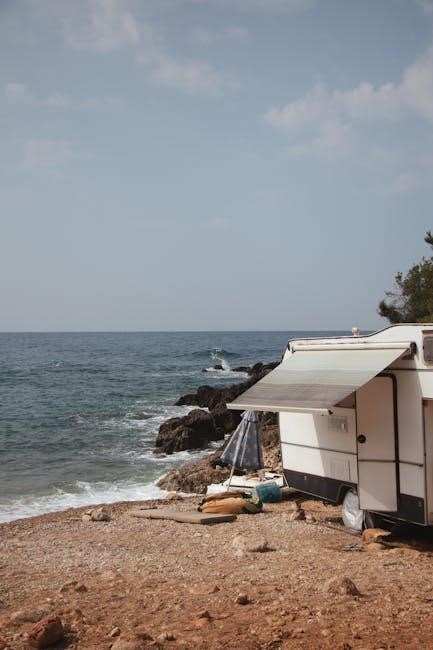
Manual camper awnings provide shade and protection from the elements, enhancing your outdoor experience. They are portable, easy to set up, and offer a cost-effective solution for RV owners.
Overview of Manual Camper Awnings
Manual camper awnings are popular additions to RVs, offering shade and protection from the elements. Designed for easy setup, they feature a durable fabric and a metal frame that can be extended and retracted manually. These awnings are ideal for campers seeking a cost-effective solution to enhance their outdoor experience. They come in various sizes and styles, catering to different RV types and user preferences. While they require occasional maintenance, manual awnings are known for their simplicity and reliability, making them a practical choice for many adventurers; Proper installation and care ensure longevity.
Why Choose a Manual Camper Awning?
Manual camper awnings are a cost-effective and practical choice for RV owners. They are easier to install and maintain compared to automatic awnings, making them ideal for DIY enthusiasts. With fewer mechanical components, manual awnings are more durable and less prone to malfunctions. They also provide a reliable shade solution without the need for complex wiring or electrical connections. Additionally, manual awnings allow users to customize their setup, offering flexibility in how they enjoy their outdoor space. This simplicity and affordability make manual camper awnings a popular choice for many campers.
Understanding the Components of a Manual Camper Awning
A manual camper awning consists of a roller and fabric kit, drive head, manual arms, awning rail extrusion, idler head, and mounting brackets.
Key Parts and Accessories Needed for Installation
To install a manual camper awning, you’ll need a roller and fabric kit, drive head, manual arms, awning rail extrusion, idler head, and mounting brackets. Additional tools include a power drill, flathead screwdriver, tape measure, and silicone spray for lubrication. A stepladder is essential for reaching the RV roof. Gloves are recommended for protection. Customized mounting kits may be required depending on your RV’s roof structure. Ensure all components are compatible with your RV’s model to guarantee a secure and proper installation.
Drive Head, Manual Arms, and Awning Rail Extrusion

The drive head is the core mechanism that winds and unwinds the awning fabric, while manual arms provide structural support and stability. The awning rail extrusion serves as the track for the fabric to roll in and out smoothly. These components work together to ensure proper tension and alignment. The drive head must be securely mounted, and the arms should be adjusted to maintain even pressure. Proper installation of these parts ensures reliable performance and longevity of the awning system. Regular maintenance is essential to keep them functioning smoothly.

The Importance of Proper Installation
Proper installation ensures stability, prevents damage, and guarantees smooth operation. It also enhances safety and extends the lifespan of your manual camper awning.
Tools and Supplies Required for Installation
For a successful manual camper awning installation, you’ll need essential tools and supplies. Start with a tape measure, power drill, and flat-head screwdriver for precise measurements and drilling. Work gloves and silicone spray are crucial for protecting your hands and lubricating moving parts. A stepladder ensures safe access to higher areas. Additionally, mounting brackets, rivets, and screws are necessary for securing components. Don’t forget a level to ensure proper alignment and a fuse for electrical connections. These tools and supplies will help you complete the job efficiently and safely.
Mounting the Door Roller and Preparing the RV
Mounting the door roller is the first step in preparing your RV for a manual camper awning. This roller is installed on the outside of the RV door using two 8x screws to prevent fabric damage. Mark the mounting locations carefully, ensuring they align with the awning’s dimensions. Drill pilot holes to secure the roller firmly. Proper installation of the door roller ensures smooth operation and prevents wear on the awning fabric. Once in place, your RV is ready for the next steps in the installation process.
Step-by-Step Installation Guide
This guide provides a detailed, sequential approach to installing a manual camper awning, ensuring a secure and proper setup for optimal functionality and durability.
Measuring and Marking the Mounting Locations
Accurate measuring and marking are crucial for a secure awning installation. Begin by measuring the length of your RV’s sidewall where the awning will be mounted. Use a tape measure to determine the exact spots for the mounting brackets, ensuring they align with the awning rail extrusion. Mark these locations with a pencil, double-checking your measurements to avoid errors. Proper alignment ensures the awning functions smoothly and remains stable in various conditions. This step sets the foundation for a successful installation.
Drilling and Securing the Brackets
Once the mounting locations are marked, use a power drill to create pilot holes for the brackets. Ensure the surface is level and clear of debris. Drill carefully to avoid damaging the RV’s exterior. Secure the brackets using the provided hardware, tightening firmly but avoiding over-tightening. Apply silicone spray to moving parts for smooth operation. Double-check the alignment and stability of the brackets before proceeding. Properly secured brackets are essential for the awning’s stability and functionality. Always wear gloves and safety goggles during this process to prevent accidents.
Installing the Awning Rail and Assembling the Spring
After securing the brackets, attach the awning rail extrusion along the RV’s side. Ensure it aligns perfectly with the mounting hardware. Next, assemble the spring by unwinding it manually and inserting the tension rod. Attach the spring to both the drive head and idler head, ensuring proper tension. Use rivets to secure the spring assembly in place. Apply silicone spray to all moving parts for smooth operation. Double-check the alignment and tension to ensure the awning functions smoothly. Proper installation ensures durability and ease of use. Follow the manufacturer’s instructions closely to avoid errors.
Maintenance and Troubleshooting Tips
Regularly clean the awning fabric with mild soap and water to prevent dirt buildup. Lubricate moving parts annually to ensure smooth operation. Inspect for worn or damaged components and replace them promptly to avoid further issues. Always check the tension of the spring and adjust if necessary. Proper care extends the lifespan of your manual camper awning.
Cleaning and Lubricating the Awning Mechanism
Regular cleaning is essential to maintain your manual camper awning’s performance. Use mild soap and water to wipe down the fabric and metal components. Avoid harsh chemicals or abrasive materials that could damage the fabric or rust the hardware. Lubricate the hinges, arms, and spring assembly annually with silicone spray to ensure smooth operation. Inspect for wear or corrosion and address issues promptly. Cleaning and lubrication prevent friction and extend the lifespan of your awning mechanism. Always follow manufacturer guidelines for care and maintenance.
Common Issues and How to Fix Them
Common issues with manual camper awnings include fabric damage, misaligned arms, and mechanical jams. For fabric damage, inspect for tears and repair with patches or replace the fabric if necessary. Misaligned arms can be adjusted by loosening bolts and realigning the brackets. Mechanical jams often result from dirt or rust; clean and lubricate moving parts. Regular maintenance, such as lubricating hinges and inspecting for wear, helps prevent these issues. Addressing problems early ensures your awning functions smoothly and lasts longer. Always refer to your manual for specific troubleshooting steps.

Best Practices for Using Your Manual Camper Awning
Regularly inspect and maintain your awning to ensure smooth operation. Always check springs and fabric tightness before use. Lubricate moving parts to prevent rust and wear.
Setting Up and Taking Down the Awning
Setting up your manual camper awning begins with attaching the arms to the RV and unwinding the spring assembly. Ensure the fabric is taut and securely fastened with brackets. When taking down, rewind the spring carefully to avoid damage. Always clean and store the awning in a dry place to prevent mildew. Regular practice makes the process quicker and more efficient, ensuring your awning remains in great condition for years of reliable use. Proper handling is key to maintaining its functionality and longevity.
Ensuring Proper Alignment and Tension
Proper alignment and tension are crucial for your manual camper awning to function effectively. Start by leveling the RV and ensuring the awning rail is straight. Adjust the arms to maintain even tension across the fabric, preventing sagging or wrinkling. Use a level tool to verify alignment and tighten brackets securely. Over-tightening can damage the mechanism, so check the manufacturer’s guidelines. Regularly inspect the fabric and hardware to ensure everything is in good condition, making adjustments as needed to maintain optimal performance and durability. Proper alignment ensures stability and extends the awning’s lifespan.

Comparing Manual vs. Automatic Camper Awnings
Manual and automatic camper awnings cater to different needs. Manual awnings are cost-effective and simple, while automatic models offer convenience but are more expensive and complex.
Pros and Cons of Manual Awnings
Manual camper awnings are highly cost-effective and easy to maintain, making them a budget-friendly choice for RV owners. They are lightweight, simple to install, and require minimal tools. However, they lack the convenience of automatic models, requiring physical effort to set up and take down. Their durability depends on proper installation and maintenance. While they offer excellent shade and protection, their manual operation can be time-consuming, especially for frequent use. Overall, they are a practical option for those prioritizing affordability and simplicity.
When to Choose a Manual Over an Automatic Awning
Opt for a manual camper awning if you prioritize affordability and simplicity. They are cost-effective, easy to install, and require no electrical connections, making them ideal for budget-conscious RV owners. Manual awnings are also lightweight and durable, suitable for those who prefer a traditional camping experience; They are a great choice for occasional use or smaller RVs, as they offer reliable shade without the complexity of automatic systems. Additionally, manual awnings are easier to maintain and repair, making them a practical option for DIY enthusiasts.
Safety Precautions and Warnings
Always follow manufacturer instructions to avoid damage or injury. Ensure proper installation and use to prevent fabric tears or mechanical failure during windy conditions.
Avoiding Damage to the Awning Fabric
To prevent damage to your manual camper awning fabric, ensure proper installation and avoid over-tightening. Use gloves when handling to prevent punctures. Keep the fabric clean and dry to avoid mold. Avoid exposure to harsh chemicals or UV protectants not designed for awning materials. Never leave the awning unattended in strong winds, as this can cause tears or stretching. Regularly inspect for wear and tear, and address any issues promptly to maintain durability. Proper storage during off-season use is also essential to preserve the fabric’s condition.
Electrical Connections and Fuse Installation
Proper electrical connections are crucial for manual camper awnings to function safely and efficiently. Always install a 15A fuse at the fuse panel for the positive 12Vdc power supply (RED wire) to avoid damage. Ensure all wiring connections inside the RV are secure and follow the manufacturer’s instructions. Incorrect wiring can lead to electrical issues or system failure. If unsure, consult a professional or the installation manual for guidance. Proper wiring ensures reliable operation and prevents potential hazards.

Final Tips for Enjoying Your Manual Camper Awning
For optimal use, always ensure your awning is properly aligned and tensioned to prevent damage and ensure stability. Regularly clean and lubricate moving parts to maintain smooth operation. Store your awning securely when not in use to protect it from harsh weather conditions. By following these simple tips, you can extend the life of your manual camper awning and enjoy shade and comfort on all your outdoor adventures. Happy camping!