
Wooden garden benches are a timeless, eco-friendly addition to outdoor spaces, offering durability and natural beauty. They provide comfortable seating while enhancing garden aesthetics. This guide explores wooden garden bench plans, including free PDF resources, DIY tips, and design inspiration to help you create the perfect bench for your outdoor oasis.
Popularity and Benefits of Wooden Garden Benches
Wooden garden benches are popular due to their natural beauty and durability. They enhance outdoor spaces with a timeless charm, offering a sustainable and eco-friendly seating solution. Unlike metal or plastic, wood blends seamlessly with nature. These benches are also cost-effective and versatile, suitable for various garden styles. Their durability ensures long-lasting use, making them a practical and aesthetic choice for any outdoor setting. Additionally, they can be customized to match personal preferences, adding value to your garden.
DIY vs. Store-Bought: Why Choose DIY?
DIY wooden garden benches are cost-effective and allow customization to fit your garden’s unique style. With free PDF plans, you can save money while creating a personalized piece. DIY projects also enable you to choose materials and designs that align with your preferences, making the bench truly yours. This approach is both rewarding and budget-friendly, offering a sense of accomplishment and a perfectly tailored addition to your outdoor space.
Materials and Tools Required
Building a wooden garden bench requires durable lumber, weather-resistant screws, and essential tools like drills and saws. These materials ensure stability and ease of assembly.
Lumber and Wood Selection
Selecting the right lumber is crucial for durability and aesthetics. Pressure-treated boards, like 2x4s or 2x6s, are ideal for outdoor use due to their resistance to rot and insects. Cedar, pine, and redwood are popular choices for their natural beauty and weather resistance. Ensure the wood is dry and free of knots for a smooth build. Consider using pressure-treated lumber for legs to prevent ground contact damage, ensuring your bench withstands the elements for years.
Hardware and Fasteners
For a sturdy and weather-resistant garden bench, choose durable hardware. Exterior-grade wood screws, galvanized lag screws, and weather-resistant bolts are ideal. Use washers to prevent splitting and ensure tight connections. Consider corrosion-resistant fasteners like stainless steel or zinc-coated options for long-lasting performance. Proper hardware selection ensures your bench can withstand outdoor conditions and heavy use, providing both safety and durability over time.
Essential Tools for the Project
To build a wooden garden bench, gather essential tools like a circular saw for cutting lumber, a drill for screwing pieces together, and a tape measure for accurate cuts. A square ensures corners are aligned, while clamps hold components in place during assembly. Sandpaper smooths rough edges, and a level guarantees even surfaces. Safety gear, such as gloves and goggles, is crucial. Optional tools include a router for decorative edges and an impact driver for faster screwing.
Choosing the Right Plans
Selecting the ideal wooden garden bench plans involves considering your skill level, budget, and desired features. Opt for plans with clear, step-by-step instructions and a detailed material list to ensure success.

Factors to Consider When Selecting Plans
When choosing wooden garden bench plans, consider your skill level, budget, and the tools you have. Ensure the plans include a detailed material list and step-by-step instructions. Think about the design style—modern or traditional—and whether it fits your outdoor space. Durability is key, so look for plans that specify weather-resistant materials. Also, consider additional features like backrests or storage; Lastly, verify the time required to complete the project and its overall complexity to match your experience level.
Free PDF Resources for Garden Bench Plans
Free PDF resources for wooden garden bench plans are widely available online. These plans often include detailed instructions, material lists, and diagrams. Many designs, such as the popular 2×4 and 2×6 bench plans, cater to beginners and experienced woodworkers alike. Some resources offer 3D diagrams and step-by-step guides, making it easy to follow along. These free PDF downloads are perfect for those looking to create a sturdy and stylish bench without breaking the bank. They also allow for customization to suit your outdoor space;
Step-by-Step Assembly Instructions
Assembling a wooden garden bench is straightforward with the right plan. Follow the included step-by-step instructions for precise cuts and secure joints using 2×4 or 2×6 lumber. Plans often include detailed guides to ensure a smooth process, helping you build a sturdy and comfortable bench with minimal tools and effort. This approach makes DIY projects accessible even for beginners.

Preparing the Components
Begin by cutting the lumber according to the plan’s specifications using a circular saw or hand saw. Sand all pieces to ensure smooth surfaces and remove splinters. Organize the components, such as legs, seat slats, and backrest supports, to ensure they are ready for assembly. Pre-drill holes for screws to prevent splitting the wood. This step ensures all parts fit together seamlessly during the assembly process, saving time and effort later.
Assembling the Bench Frame
Start by assembling the frame using 2×4 or 2×6 lumber, depending on the plan. Attach the legs to the seat frame using wood screws, ensuring a sturdy base. Pre-drill holes to avoid splitting the wood. Use a drill and measuring tape to align components accurately. Tighten all screws securely for stability. Double-check measurements for precision before moving forward. Sand the frame to ensure smooth edges and a splinter-free surface.
Adding a Backrest for Comfort
Add a backrest to enhance comfort and style, using a few 2x6s and basic tools. Follow simple plans for a sleek, ergonomic design that complements your bench.
Design Considerations for a Backrest
When designing a backrest, consider ergonomics for optimal comfort. Use 2×6 lumber for durability and a natural aesthetic. Ensure slats are evenly spaced for support and drainage. The backrest should be slightly angled to promote relaxation. Add a cap rail for finishing touches and stability. Personalize the design by adjusting the height and style to match your bench and garden decor, ensuring a cohesive look and enhanced functionality.
Attaching the Backrest to the Bench
Align the backrest with the bench frame, ensuring proper fit and balance. Drill pilot holes to prevent wood splitting, then secure using weather-resistant screws. Apply wood glue for added stability; Tighten firmly but avoid overtightening. Sand all edges for safety. Ensure the backrest is level and securely attached before use. Allow the glue to dry completely for maximum durability. This step ensures a sturdy, long-lasting addition to your garden bench.

Design Variations and Customization
Explore modern and traditional designs, adding personal touches like backrests, armrests, or storage compartments. Customize wood finishes or carvings to match your garden’s unique style and decor.
Modern vs. Traditional Designs
Modern wooden garden benches feature sleek lines, minimalist aesthetics, and innovative materials, while traditional designs emphasize classic forms and intricate details. Modern benches often incorporate metal accents or bold geometries, creating a contemporary look. In contrast, traditional benches may include carvings, curved silhouettes, or ornate patterns, evoking timeless charm. Both styles cater to different tastes, allowing homeowners to choose a bench that complements their garden’s unique ambiance and personal style perfectly.

Adding Storage or Armrests
Add functionality to your wooden garden bench by incorporating storage compartments or armrests. Storage benches offer a convenient place to stash cushions, tools, or outdoor essentials. Armrests provide extra comfort and support, making the bench more inviting for relaxation. Both features can be seamlessly integrated into modern or traditional designs using 2×4 or 2×6 lumber. Free PDF plans often include step-by-step instructions for these add-ons, ensuring a practical and stylish upgrade to your outdoor seating.

Safety Tips and Maintenance
Ensure your wooden garden bench is weatherproofed and regularly inspected for damage. Use protective finishes and sturdy materials to maintain structural integrity and longevity, ensuring safe outdoor seating.
Ensuring Structural Integrity
To ensure your wooden garden bench is sturdy and long-lasting, use high-quality, weather-resistant lumber like pressure-treated or cedar wood. Secure all joints with durable wood screws or bolts, and follow proper assembly techniques. Regularly inspect the bench for signs of wear or damage, addressing issues promptly to prevent further deterioration. A well-constructed bench will provide safe and reliable seating for years to come, enhancing your outdoor space.
Weatherproofing and Upkeep
Protect your wooden garden bench from the elements by applying a durable water-resistant sealant or finish. Regularly clean the surface to prevent mold and mildew buildup. Inspect for signs of rot or pest damage and address promptly. Applying a fresh coat of sealant annually will maintain its appearance and extend its lifespan. Proper upkeep ensures your bench remains a beautiful and functional outdoor feature for years to come.
Budget and Cost Estimation
Estimate costs based on materials like lumber, screws, and sealants. A basic bench may cost $25-50, while more complex designs can range up to $100, depending on size and features.
Estimating Material Costs
Estimating material costs involves listing all required components, such as lumber, screws, and weatherproof sealants. For a basic bench, costs range from $25 to $50, depending on wood type and size. Pressure-treated boards, for example, may cost $10-$15 each, while hardware like screws and bolts adds another $10-$20. Larger or intricate designs can increase expenses up to $100. Always compare prices at local hardware stores or online retailers to optimize your budget.
Reducing Expenses Without Compromising Quality
Save money by using affordable materials like pressure-treated lumber or reclaimed wood. Opt for simple designs that minimize material waste. Shop during sales or use coupons to reduce hardware costs. Consider DIY techniques to avoid labor expenses. Plan carefully to avoid overbuying materials. Free PDF plans often include cost-saving tips, ensuring you build a durable, attractive bench without overspending. This approach keeps your project budget-friendly while maintaining quality.
Completed Project Showcase
Discover stunning examples of finished wooden garden benches, showcasing various designs and finishes. These projects highlight durability, style, and functionality, inspiring your own DIY creation. See how others have successfully transformed their outdoor spaces with beautiful, handcrafted benches that blend seamlessly with nature.
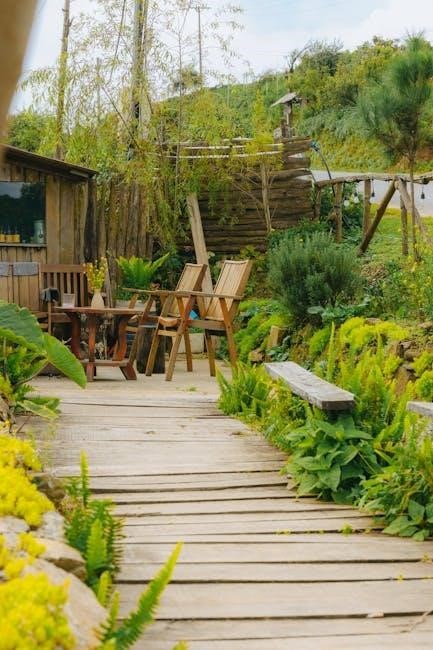
Examples of Finished Garden Benches
Finished garden benches showcase a variety of designs, from modern to traditional, crafted with durable materials like cedar, pine, or recycled wood. Some feature sleek, minimalist lines, while others include intricate carvings or decorative accents. Benches with backrests offer enhanced comfort, while storage benches provide practicality; Many examples highlight natural finishes or vibrant stains, blending seamlessly with outdoor settings. These completed projects inspire creativity and demonstrate the versatility of wooden garden benches in enhancing any landscape.
Reader Submissions and Success Stories
Readers have shared their successful DIY projects, showcasing beautifully crafted wooden garden benches. Many used free PDF plans to create stunning pieces, from modern designs with backrests to traditional styles. Hobbyists praised the ease of following step-by-step instructions, even with limited tools. One reader transformed their patio with a bench made from reclaimed wood, while another added storage for outdoor cushions. These stories highlight the joy of creating functional, personalized outdoor seating and the sense of accomplishment that comes with it.